How to Make Beeswax Wraps at Home
I’ve been thinking a lot about beeswax wraps and their place in our kitchen lately and just love how beeswax wraps are a great eco-friendly & sustainable alternative to plastic cling wrap.
Beeswax wraps are a great eco-friendly option because once they reach their end-of-life, provided they’re made out of a natural fabric (think cotton, linen, lenzing ecovera), you can either re-coat them to get more use out of the wrap, or cut it up into small pieces and pop them into the compost bin. This makes beeswax wraps a really good zero-waste option and remembering this fact has inspired me to incorporate them even more into my day-to-day.
Beeswax wraps also make great gifts as well as they come in all sorts of designs & a gift of beeswax wraps are sure to encourage your loved ones to explore more eco-friendly options.
You can purchase beeswax wraps from many eco-stores and local businesses, however if you’re interested in a bit of DIY and would love to make your own, then today I’m going to show you how.

WHAT ARE BEESWAX WRAPS
Beeswax wraps are an alternative to traditional cling wrap and are basically fabric pieces coated in a special beeswax blend. When the beeswax wrap is warmed between your hands, it becomes sticky allowing you to easily mould it around bowls, fruits and sandwiches - much like cling wrap.
HOW TO USE BEESWAX WRAPS
Beeswax wraps can be washed under cold/warm water and left to dry and reuse again and again. Don’t use hot water as it can melt the wax off. You can use beeswax wraps to wrap all sorts of things to keep them fresh, as well as using them to cover bowls - just don’t use them for meat or raw items.
HOW LONG DO BEESWAX WRAPS LAST?
With good care, they’ll last around a year with regular use before the wax wears off. At this point, you can either re-coat the wrap with beeswax yourself, or cut it into small squares and allow it to break down naturally in compost.

HOW TO MAKE BEESWAX WRAPS AT HOME
Beeswax wraps were so much easier to make than previously anticipated, mainly because I came across Beeutiful’s amazing kit. Most methods I had seen online required an iron or grater, or some additional step of melting the wax into smaller pieces/liquid, however with Beeutiful’s kit, you can make beeswax wraps much more easily! This kit contains a special beeswax blend in handy sized cubes so that you don’t have to buy various oils and blend them together. Plus, it comes in really handy small sized cubes so that you can melt them directly onto the fabric!
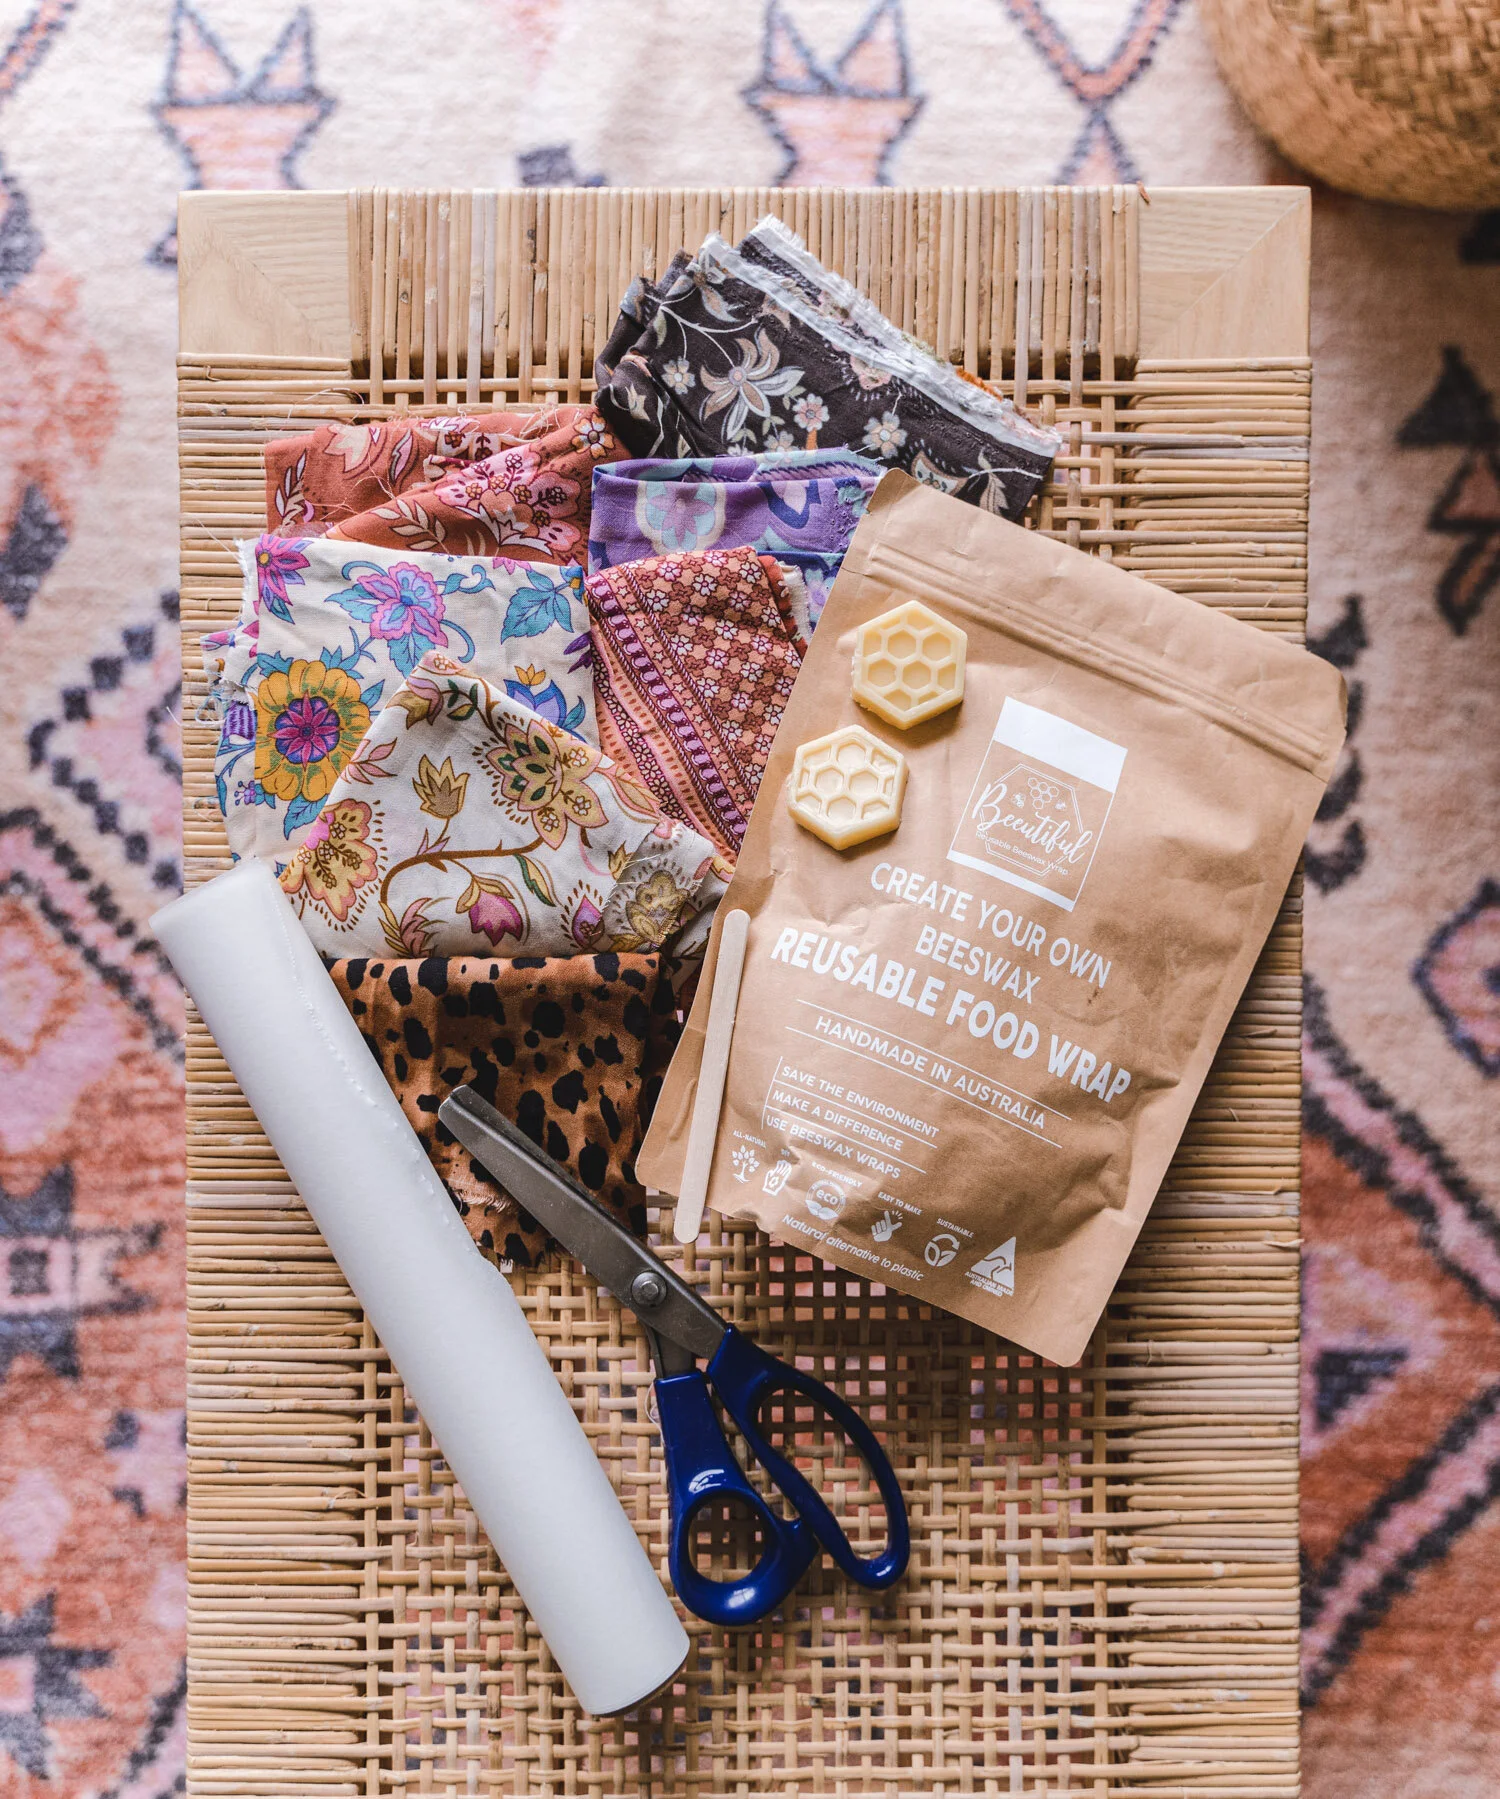
YOU WILL NEED:
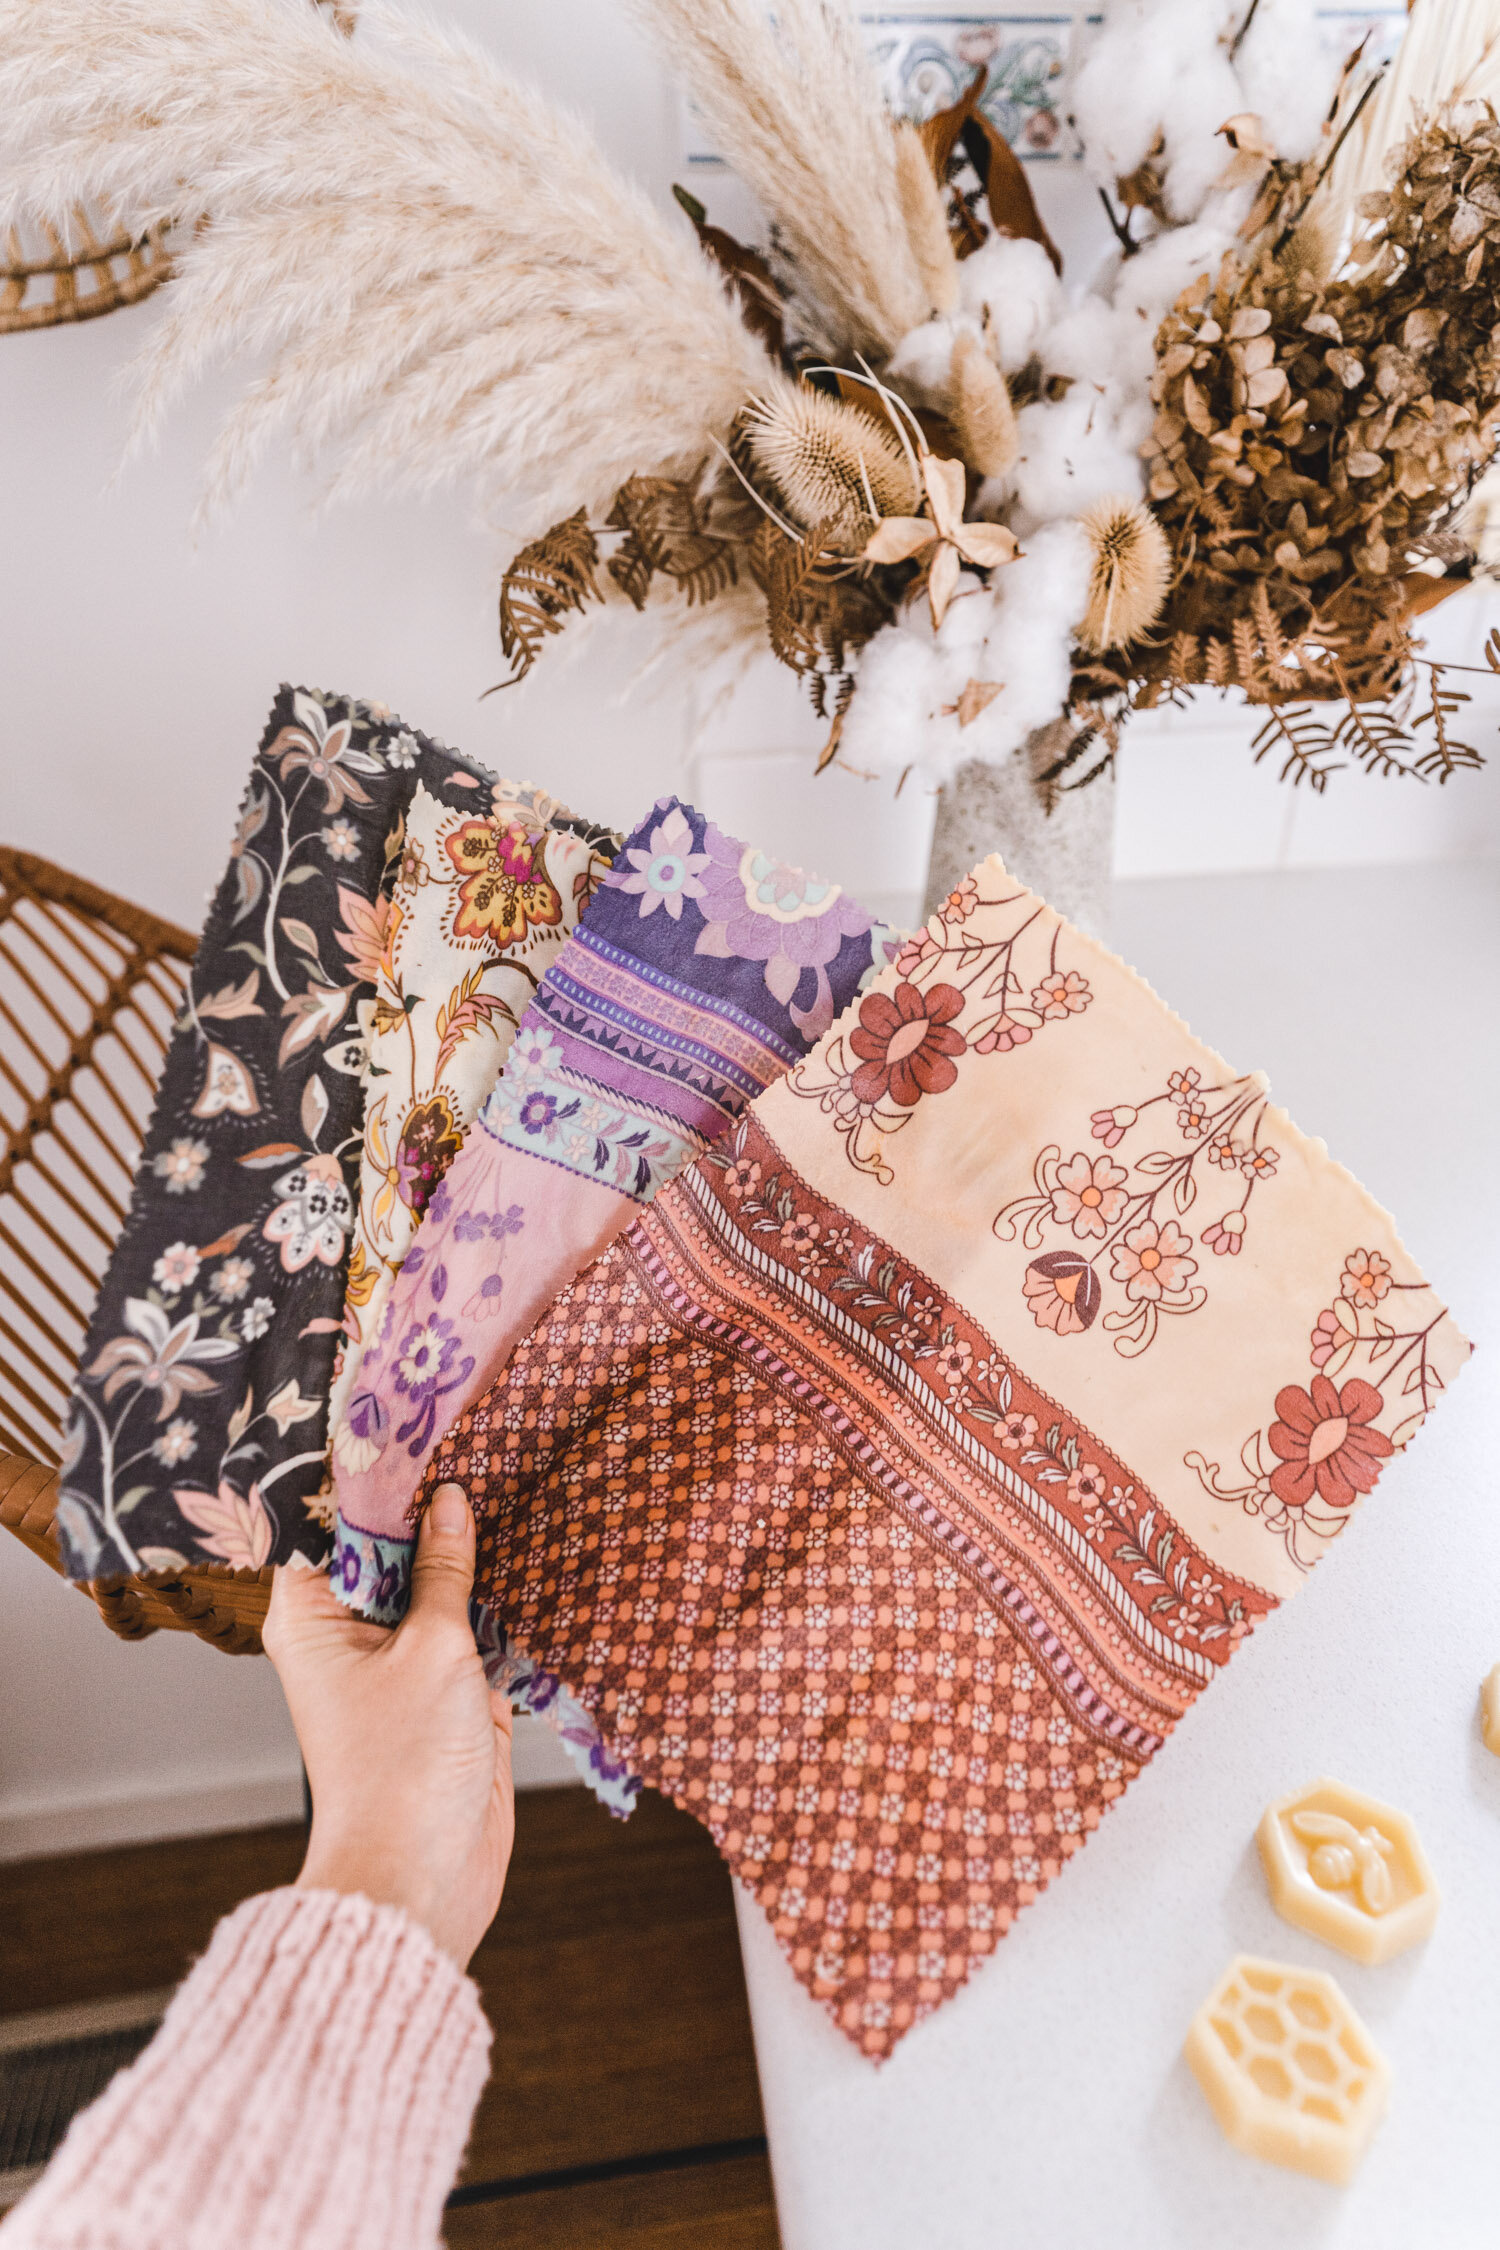
Scrap fabrics in natural fibres (cotton, linen, hemp, lenzing ecovero which is derived from sustainable wood and pulp, etc). Consider using clothing you don’t wear, table cloths, fabrics from your craft drawer or from clothing alterations - I’m using some gorgeous scraps from Spell & The Gypsy Collective
Beeutiful’s beeswax wrap DIY kit: includes a special blend of beeswax and oils in cubes for making beeswax wraps, paddle pop sticks + a great set of instructions
Pinking shears (optional, but great for cutting decorative edges and preventing fray)
Baking paper
Oven
INSTRUCTIONS:
Or if video is your thing, watch the video on the left!
1. Prep your fabric by washing, drying & ironing out creases.
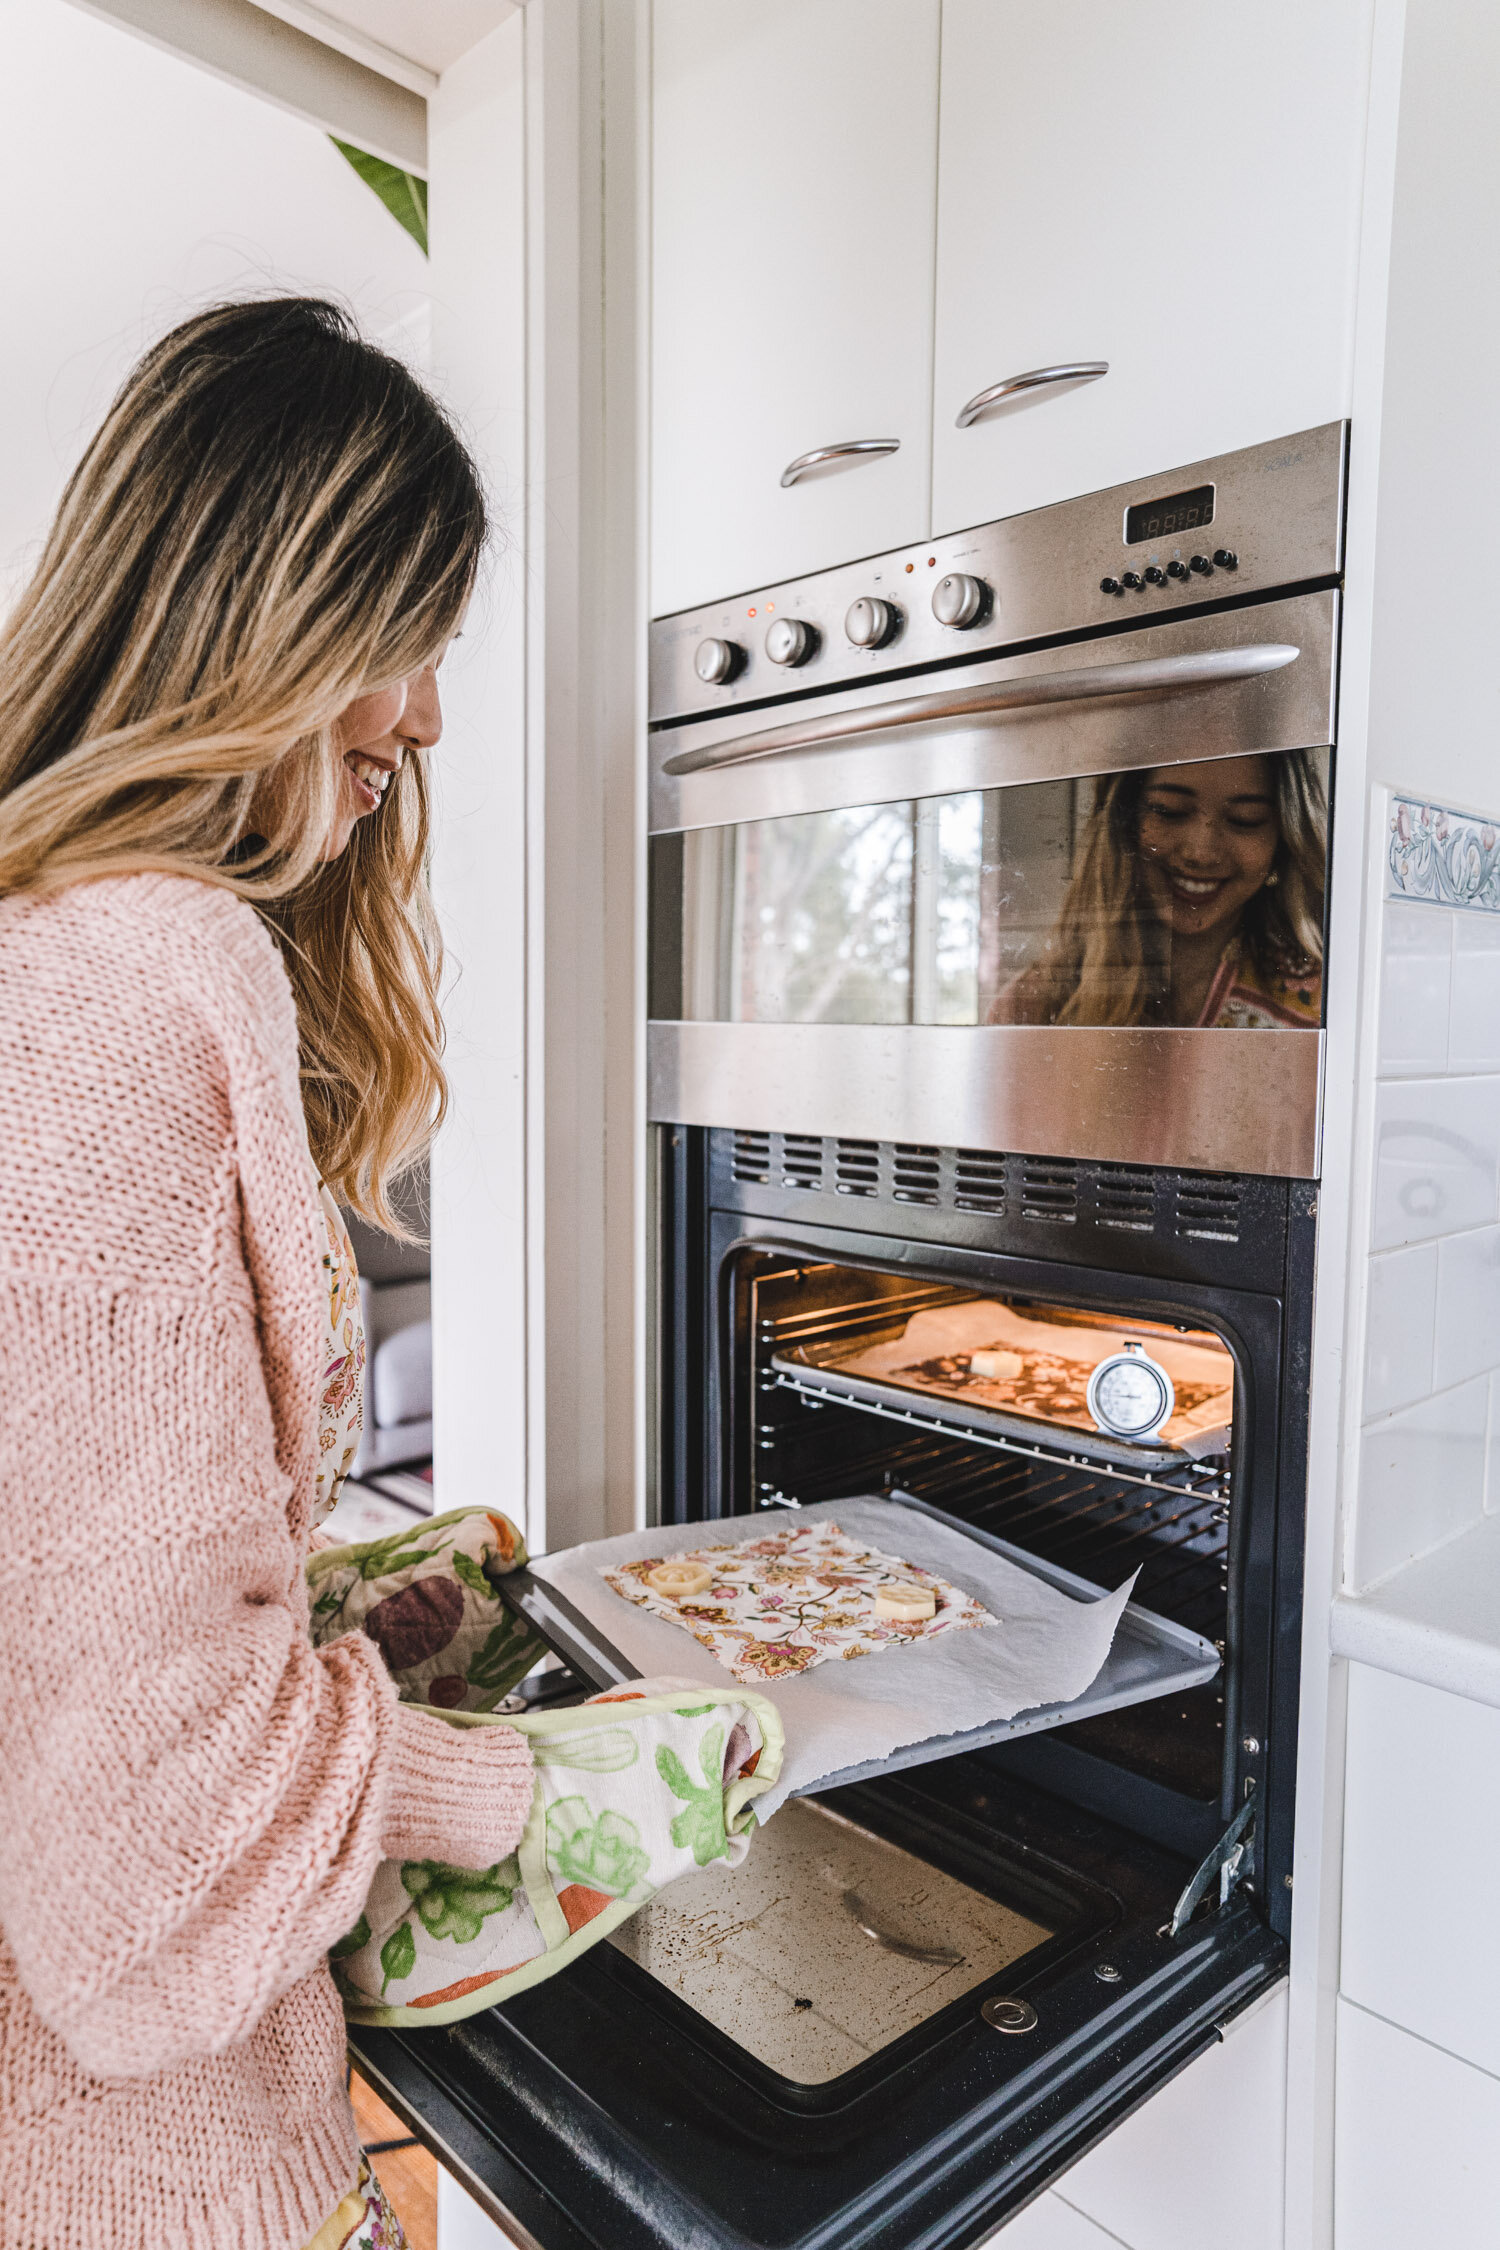
2. Preheat oven to around 80-100 degrees - some oven temperature indicators aren’t completely accurate so if you have an oven thermometer it’s best to use this to double check.
3. Measure and cut out squares/circles to serve as your wraps. The beauty of making your own beeswax wraps is that you can cut them in whatever shapes you wish and whatever sizes you need. I cut out two smaller sizes for covering jars, two medium sizes for covering small bowls and a large size for wrapping up bread, etc.

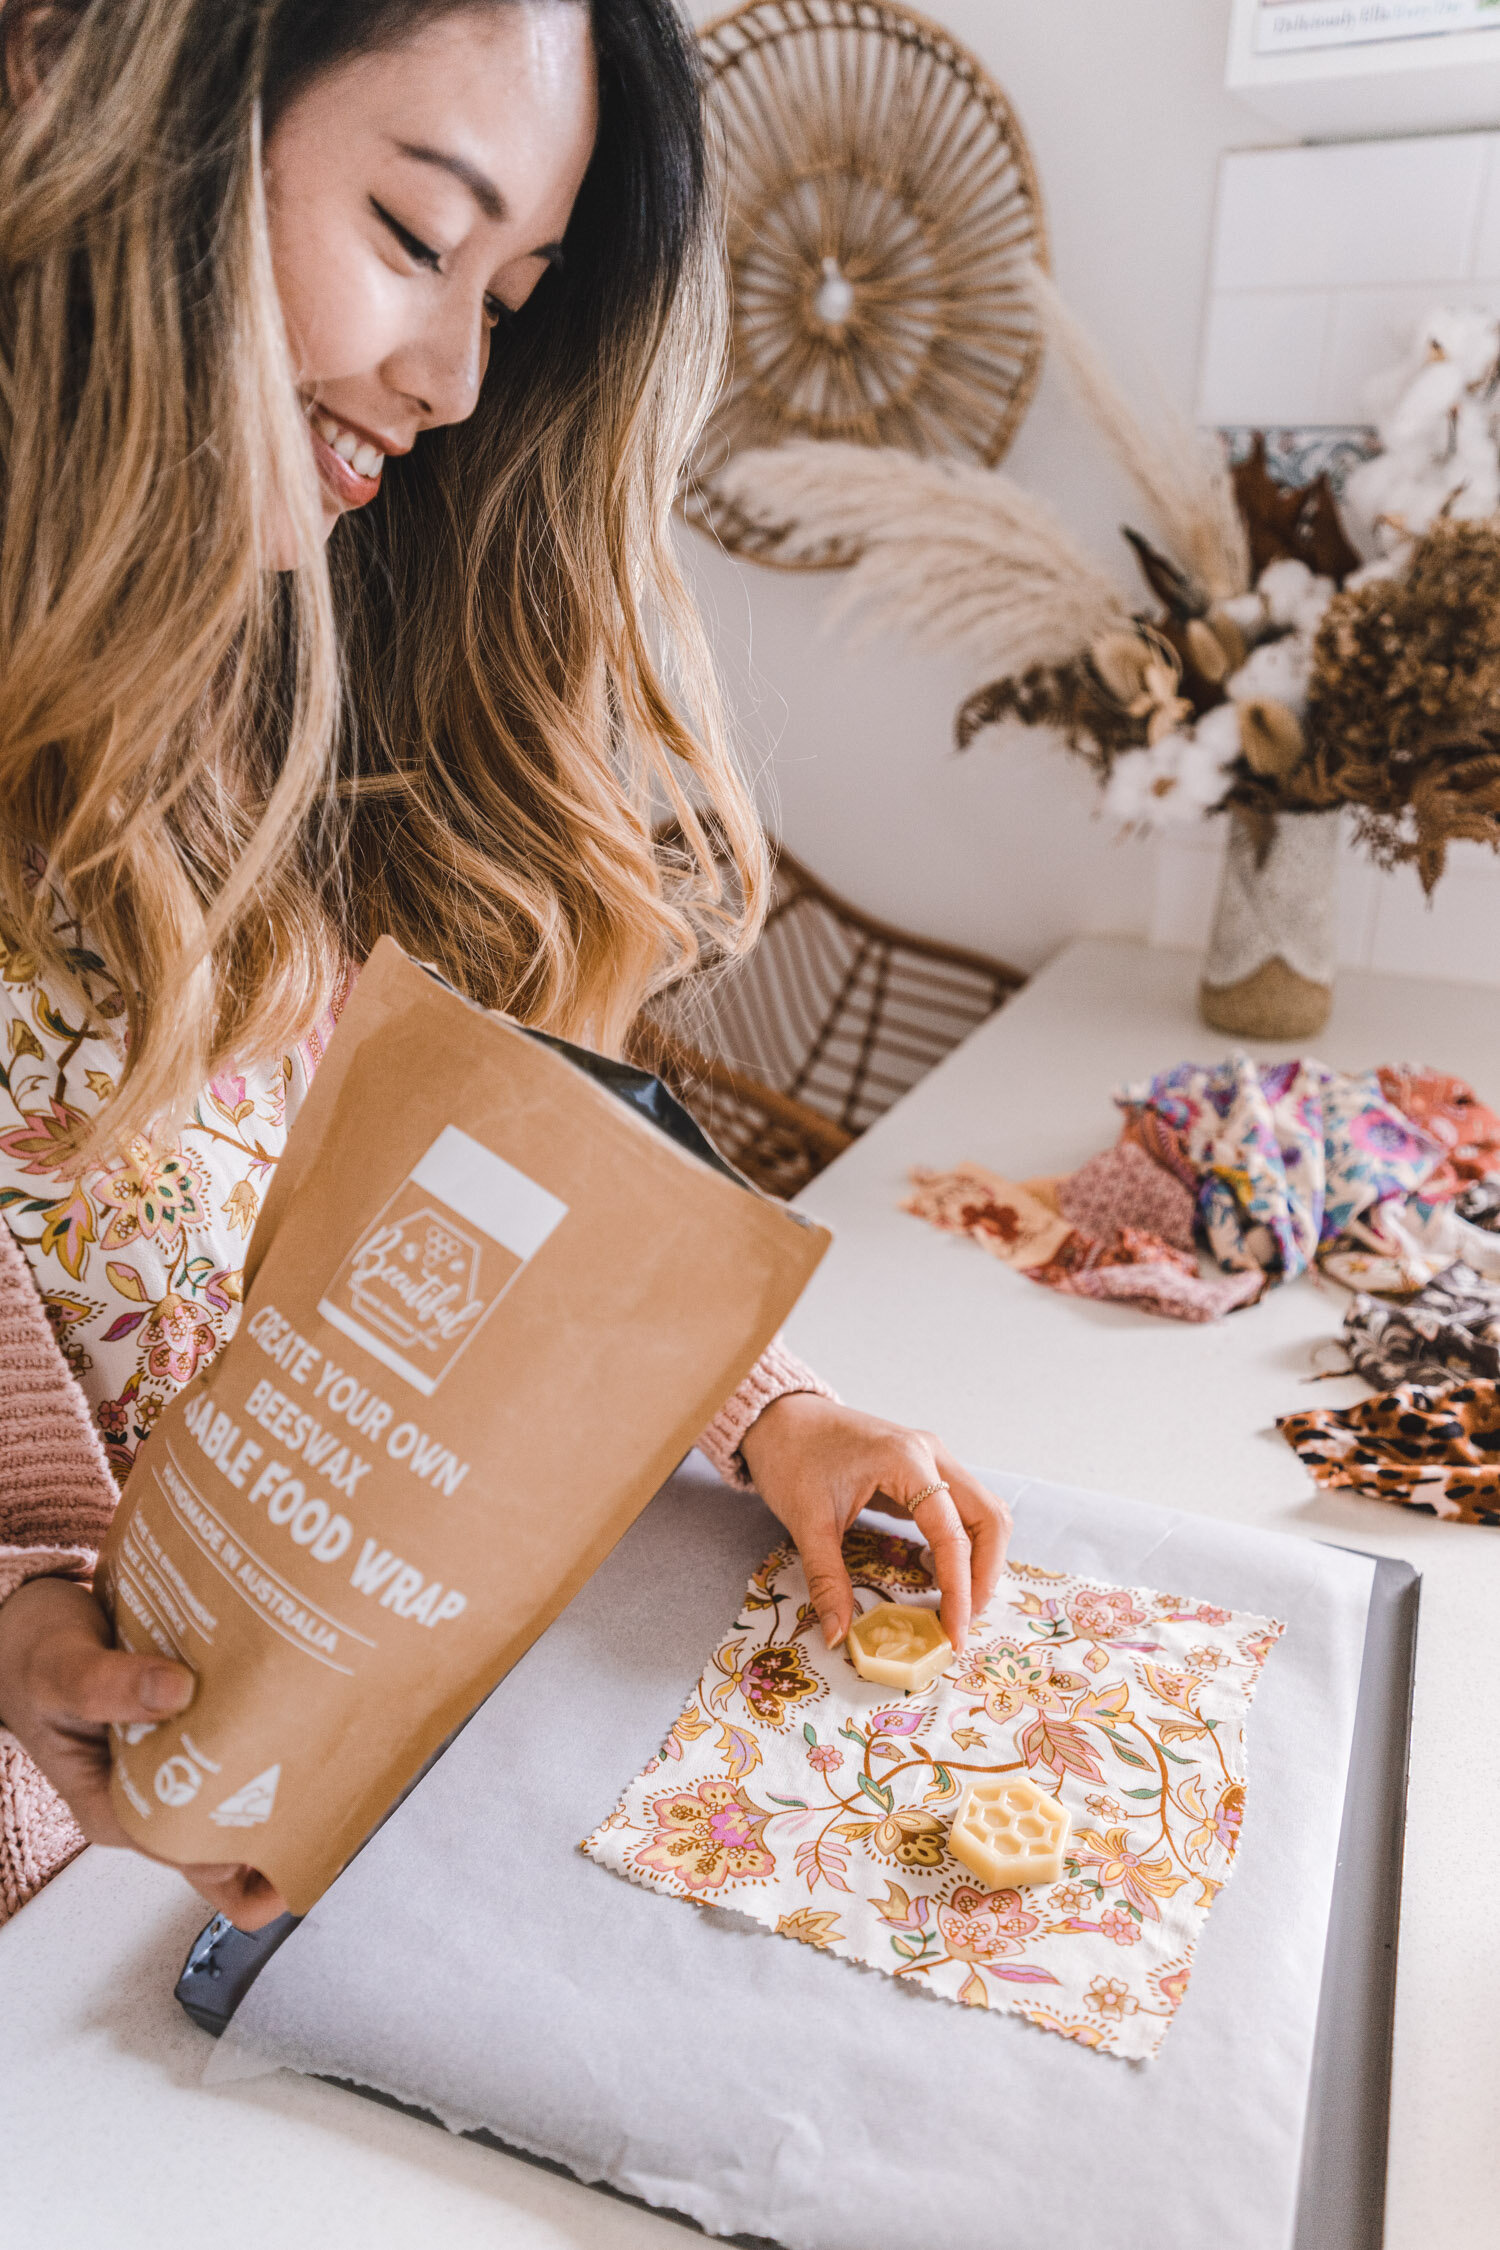
4. Cut out some baking paper that’s larger than the fabric pieces you are using. Starting with the smallest piece (as it’s easier to make!) place your fabric on the baking paper.

5. Place a number of Beeautiful’s beeswax cubes in the centre of the wrap - the DIY kit comes with instructions and guides on how many beeswax cubes are recommended for different sizes of fabric. Larger pieces will need more cubes.

6. Place the tray into the oven and wait until the beeswax starts melting creating a pool of liquid.
7. Once the beeswax cubes have melted a little, using your paddle pop stick / skewer, move the beeswax cube across the fabric to a dry spot to allow it to continue melting further.
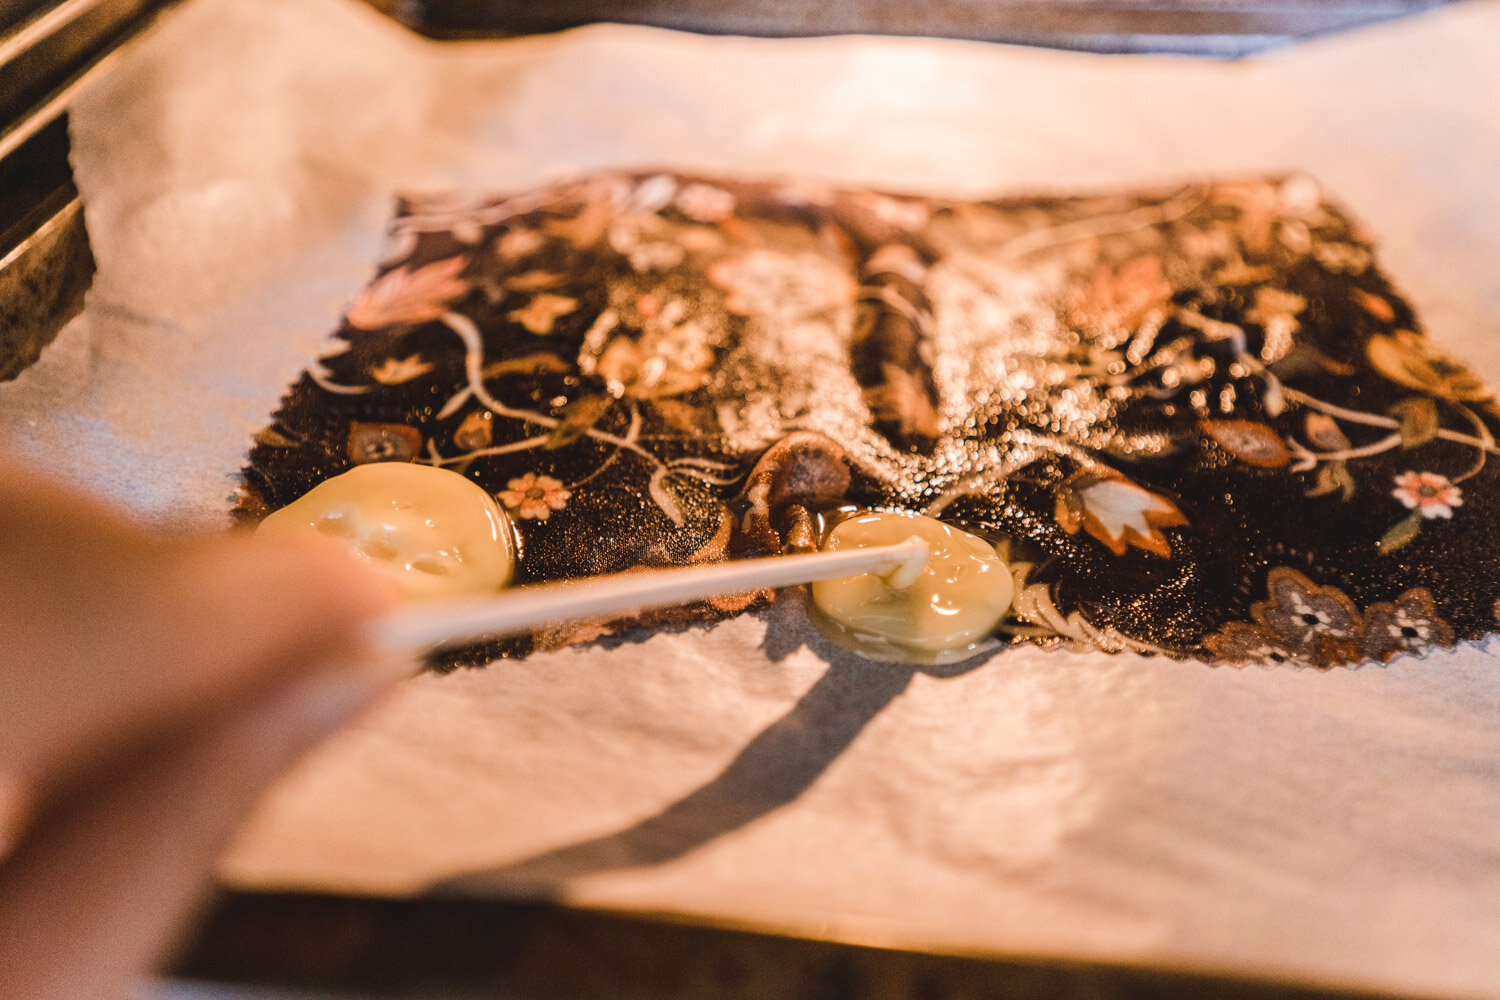
8. Continue doing this until the whole fabric is covered in wax. Once the fabric is covered in completely covered in wax, it’s ready!
9. Remove the tray from the oven. Moving quickly (as beeswax dries quick!), gently separate the beeswax wrap from the baking paper from one side and hold it up above the baking paper to allow for excess wax to drip off, before it hardens completely.

10. Once you have allowed the excess wrap to drip off, it’s likely the beeswax wrap has already started to dry off. Transfer your wrap onto a fresh piece of baking paper (or onto your table, if it’s already quite dry) and allow it to sit for 5 minutes to dry completely.
If you have too much beeswax on your fabric or uneven clumps of beeswax on your fabric once your beeswax wraps are dry, you can simply put it back in the oven, let it melt, and when peeling the wrap off the baking paper, allow the excess wax to drip off again.

ZERO WASTE TIP
Once you’ve finished with your project, you’ll most likely have excess beeswax on your baking paper that has dried up. Peel this off and instead of throwing this out, scrunch it into a ball to keep and use for next time!
I hope you enjoyed this post and happy crafting!
