We Got a Vegepod! Set-up, Progress & Review
If you’ve been following my gardening journey on Instagram you will have seen that last spring I welcomed a Vegepod into our garden!
The whole journey started when I wanted to add more garden beds to our existing set up but wanted everything to be as low maintenance as possible and so I went in search for a wicking bed system. I love the idea of a wicking bed - it’s something you can DIY by converting existing garden beds or building your own from scratch however it can be a bit time consuming to set up and so when I came across Vegepod, a pre-fabricated raised bed with a wicking/self-watering feature and more, I knew it was something I had to check out and after a few months of owning my first Vegepod, I ended up getting myself second one for Christmas to expand my growing space!

The Vegepod solves some of the most common concerns that myself and fellow gardeners often have when it comes to growing veggies successfully such as keeping up with watering + keeping out pests.
It’s jam packed with fabulous features and is something that anyone can easily set up and use.
Vegepod’s features:
Its design is self-watering as there is a built-in wicking bed system that keeps plants watered so that daily watering is not needed. There’s also drainage holes as well so that it doesn’t flood with heavy rains.
It comes with a protective mesh cover to keep out pests such as possums, rats, butterflies and the like from eating your veggies.
It has a built in mister which you can connect to your hose for easy irrigation. Of course, you can simply hand water it as well when needed.
Stands and trolleys are available so that you can raise the garden bed at a comfortable level for gardening. Plus the trolleys are perfect so that you can wheel it around your garden easily to chase the sun or change its location!
The company also sells spare parts and accessories so that you can customise your Vegepod or purchase replacement parts at any time.
Setting up the VEGEPOD
The Vegepod that I have is the large sized Vegepod and I was able to set this up all on my own. It took the majority of my Saturday to do so, however most of the time was spent trying to level off our site as we are on a sloping block. If you didn’t have to do this, then it’d probably take no more than half a day. I set up my stand first and then set up my Vegepod bed on top of it. I found doing the stand first was definitely a good idea as you can then set up the Vegepod directly on top, as well as make sure the stand is on even ground before setting the Vegepod up.
When setting up, I found watching the videos on the Vegepod website extremely helpful - I didn’t have to reach for the instructions at all. The stand was largely a nut & bolt operation. The Vegepod bed was also quite simple to set up, using a LEGO-style system to build the walls with everything else quite straight forward as well.
Note the large Vegepod is the only one in the range that doesn’t come with the option of a trolley stand with wheels as it’s too heavy for it. However both the small and medium Vegepods come with the option of a trolley stand with wheels which I super recommend - though the large one is best value for money in terms of growing area!


CHOOSING SOIL FOR THE VEGEPOD
The great thing about Vegepod is that they clearly specify how many litres of soil is required to fit each bed as well as provide recommendations on what to fill it with so it takes the guesswork out of such things.
The large Vegepod takes around 440 litres of soil and Vegepod recommends using premium potting mix mixed - they have a few different suggestions online on ‘soil recipes’ and so I decided to go by one of their recommended suggestions and did a mix of 250L premium potting mix, 100L cow manure and 100L perlite. I mixed these together by hand whilst filling the Vegepod bit by bit. Don’t forget to wear a face mask when handling these products for safety and dust.

WHAT I PLANTED IN MY VEGEPOD
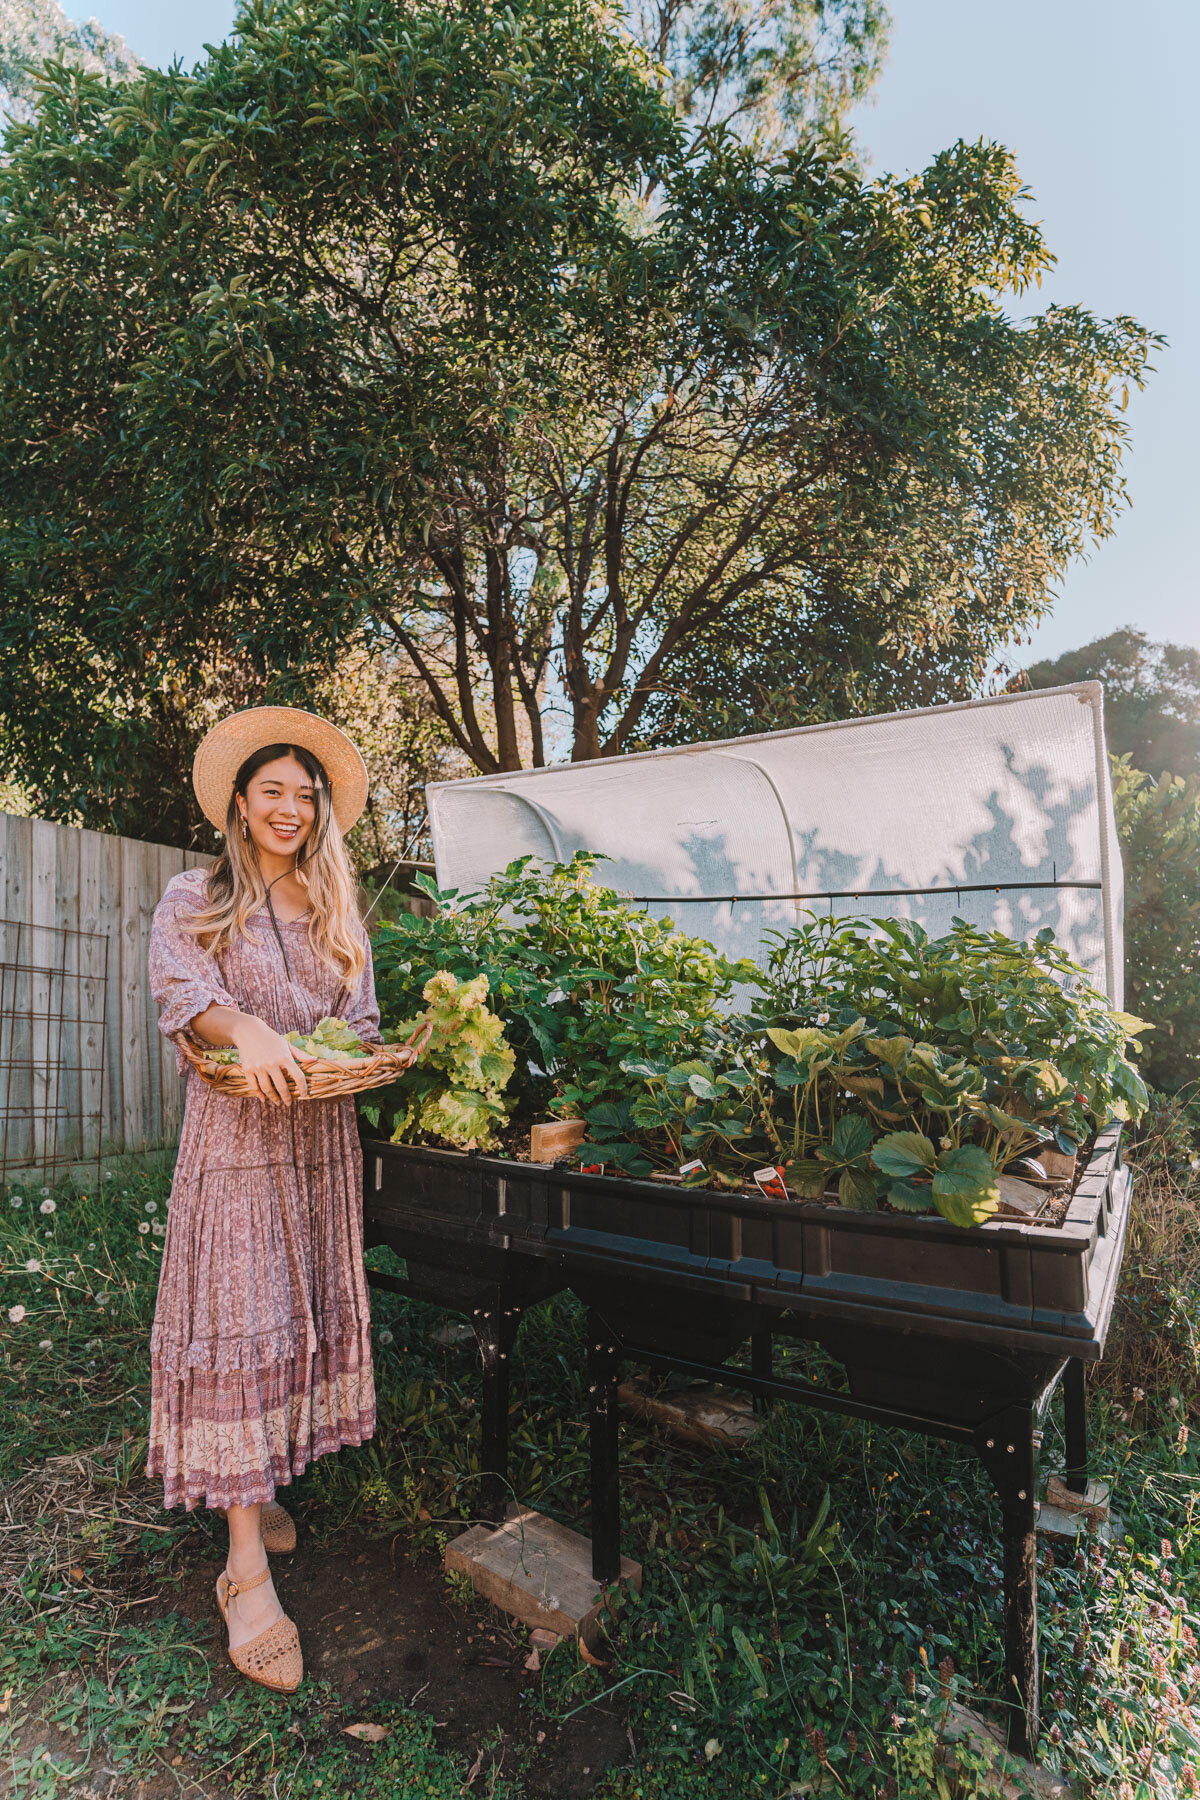
As we’re in summer here in Melbourne, I filled my Vegepod with a variety of summer things. At the front of the Vegepod I sowed a lettuce/salad mix and loved how the canopy would keep my salads safe from butterflies and caterpillars!
Next to my salads I dedicated about a quarter of the Vegepod to my strawberry patch. Towards the back I planted a determinate tomato, celery, capsicum and eggplant. And in every single spare space, I squeezed in basil.
The below is what my Vegepod looked like when I first planted it out (some were sown as seeds, the rest were transplanted as baby seedlings)


Here’s the Vegepod growth-in-progress:


And here’s the Vegepod now - everything has settled in comfortably!


I’m loving how safe all my produce is when planted in the Vegepod - never do I have to worry about my strawberries being eaten before we get to them, or having to pick caterpillars off salad leaves or for capsicums to go walk-about. We’ve been harvesting from the Vegepod continually for weeks now and it’s been giving us some surprisingly big strawberries (I think the improved water supply from the self-watering feature must definitely have something to do with this).
As mentioned, I loved my first Vegepod so much that I ended up getting another one for Christmas! Come winter, I’m thinking of reserving the real estate for my spinach and salad mix - to create a cut & come again bed of greens, as well as planting out the second one full of cut & come again Asian greens.


THOUGHTS & TIPS FROM MY EXPERIENCE
All in all I’ve loved having my Vegepod. The constant access to water via its wicking / self-watering feature makes plants in it thrive as it’s less likely to dry out. And I love not having to water it as much, and how protected everything is from its canopy.
Vegepods come in three different sizes (small 50cm x 100cm, medium 100cm x 100cm + large 100cm x 200cm). If you’re thinking of getting a Vegepod, my suggestions are:
If you have a large space, know exactly where you want to put them & want to grow large things, go for the large bed. Of course, you can still move them if you need to - you’ll just have to empty out the soil onto a piece of tarp first!
If you have a large space but want to have them easier to move, then go for multiple medium beds as you can get them on wheels.
If you have a balcony or small courtyard, then something like the small pod may be the perfect fit as at 50cm x 100cm in size, it’s bound to fit various small spaces, even balconies!
Vegepods are great for things like a salad bar, and would also be wonderful for a dedicated strawberry patch, herb garden, etc.
Another idea is to use them as mini greenhouse as you can purchase greenhouse style covers for it as well which is amazing!


Hope you guys found this post helpful - I’m off to set up my 2nd Vegepod in preparation for next season!